IHC Protocol - Frozen Tissue

Immunohistochemistry on Frozen tissues
IHC Protocol - Frozen Tissue: An introduction
This is the second post in a series on immunohistochemistry (IHC). The first post looked at one of the two main ways of carrying out IHC – paraffin embedded sections – and in this post we’ll take a look at preparing frozen sections.Which do you choose, frozen or paraffin?

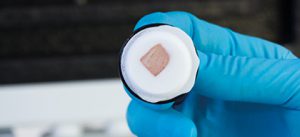
Frozen tissue section
Depending on what you want to achieve, and what’s available in your lab will affect whether you choose paraffin embedded or frozen tissue sections. For example, paraffin embedded sections are typically better at preserving tissue morphology and allow larger pieces of tissue to be used. However, the use of fixatives like paraformaldehyde can cross link antigens reducing their immune reactivity. Getting them back requires antigen retrieval procedures to ‘unmask’ them, and some antigens can even be irrecoverably destroyed by the preparation of paraffin sections. The alternative is using frozen sections. Generally, the snap freezing process behind preparing frozen sections is better at preserving antigens, but this may come at the cost of a loss of tissue morphology. Preparing frozen sections is probably the easier of the two methods. There are entire textbooks written about IHC, so what follows below is only a guide to help get you started. Fortunately, nearly all antibody manufacturers who have validated their antibodies for use in IHC will have a recommended protocol for you to follow, so whether you are using one from American Research Products or another, please always check the data sheet. So, without further preamble, let’s get started.Reagents for IHC-Fr:
- PBS (Ice cold)
- Isopentane (cooled in dry ice)
- Optimal Cutting Temperature Medium (OCT) – available from many manufacturers
- Fixation medium (e.g. acetone at -20°C)
- Blocking buffer (5% BSA in PBS)
The basic steps of the IHC-Fr protocol
- Step one: Preparing the tissue
- Step two: preparing for cryostat sectioning
- Step three: Cryostat sectioning
- Step four: Fixing
- Step five: Staining
Step one: Preparing the tissue
- Wash you tissue using ice cold PBS
- Cut the tissue into slices of about 3mm
- Snap freeze the tissue in the dry ice cooled isopentane and keep at -70°C until ready
Step two: preparing for cryostat sectioning
- Prepare a mold
- Place your tissue in the mold and cover with Optimal Cutting Temperature (OCT) medium
- Carefully, using forceps around the bottom of the mold, place in liquid nitrogen for one to two minutes
Step three: Cryostat sectioning
Again, this step may be slightly different depending on what equipment you have, so not all of this may apply to you – always follow the manufacturer’s instructions where possible.- Pre-cool the cryostat according to the manufacturer’s instructions
- Place the mold in the slicer
- Use the cryostat to make slices of about 5-10 µm
- Mount slices on a cover slip (e.g. gelatin-coated histology slides)
- Air dry at room temp for ~30 min
- Store slides at -70°C

Cryostat Sectioning
Step four: Fixing
There are many possible fixing methods, below is an example- Immerse slide in pre-cooled acetone (-20°C) for 10 minutes
- Pour off fixative and allow to evaporate for ~20 minutes at room temp
- Immerse slide in PBS (pH 7) to wash for about 5 minutes. Repeat twice.
- Incubate slides in 0.3% H2O2 in PBS at room temp for 10 minutes
- Immerse slide in PBS (pH 7) to wash for about 5 minutes. Repeat twice.
Step five: Staining
As always, if your antibody has an included protocol for IHC staining, follow that first. If not, the below is a guide to get you started, but you will likely have to optimise it for your antigen, species or tissue type, etc.- Blocking
- Add 5% BSA in PBS to your antigen retrieved samples, ensuring you add enough to cover them
- Incubate for 30 min to 2 hours at +37°C, with gentle agitation
- Discard the excess – no need to wash
- Primary antibody incubation
- Dilute primary antibody to manufacturer’s instructions to suggested concentration
- Add to sample and incubate overnight at +4°C
- Rinse twice with PBS, 20 min each time with gentle agitation
- Secondary antibody incubation (biotinylated)
- Dilute secondary antibody to manufacturer’s instructions to suggested concentration
- Incubate for 1 hour at room temperature
- Rinse twice with PBS, 20 min each time with gentle agitation
- Staining – this will depend on your chosen detection method, we’re assuming strep-HRP. Again, follow manufacturer’s instructions if given
- Add the strep-HRP and incubate for 30 min at room temp
- Rinse twice with PBS, 20 min each time with gentle agitation
- Add detection reagent (e.g. DAM, TMB) incubate in the dark at room temp for 10 to 30 minutes.
- Rinse in running tap water for 5 minutes
- Counter stain (e.g. with haematoxylin) if needed
 Filed Under : IHC

